
How to Repurpose and Compost Your Bouquet After the Flowers Have Faded
Contents:
- Before You Start: Preparation
- Step 1: Decide What’s Worth Saving
- Step 2: Dry the Flowers You Want to Keep
- Air-Drying
- Silica Gel Drying
- Microwave with Silica Gel
- Step 3: Repurpose Petals Before They’re Gone
- Homemade Potpourri
- Petal-Infused Oil
- Natural Fabric Dye
- Step 4: Compost the Remaining Organic Material
- Basic Steps for Composting Flowers
- How Long Does It Take?
- Step 5: Apply or Store Your Finished Compost
- Regional Differences: Northeast vs. South vs. West Coast
- Northeast (Zone 4–6)
- South (Zone 7–10)
- West Coast (Zone 8–10, Pacific Northwest and California)
- Seasonal Timeline: When to Do What
- Composting vs. Bokashi: Which Is Right for Your Situation?
- Pro Tips
- Frequently Asked Questions
- Can I compost flowers that were treated with preservatives or flower food?
- How do I know when compost is ready to use on plants?
- Can I compost flowers that had disease or pests?
- Are all flowers safe to compost?
- What should I do with the vase water?
- What Happens When You Close the Loop
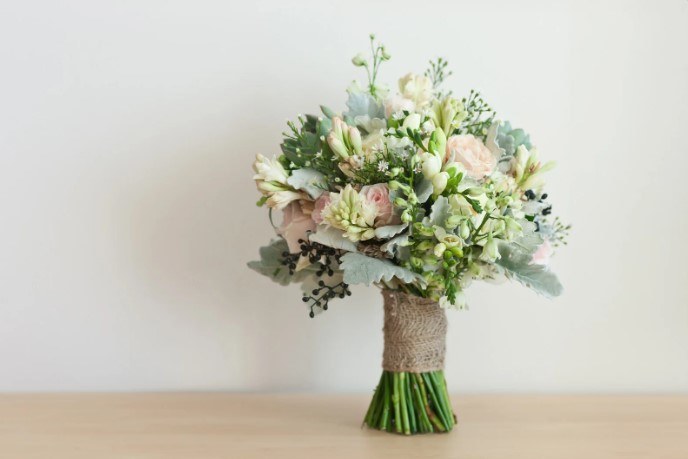
American households throw away roughly 80 percent of cut flowers within two weeks of purchase — most of them directly into the trash, where they end up in landfill and release methane as they decompose. That’s a waste of organic matter that your garden would gladly accept, and a waste of the sentimental value still locked in those petals. A faded bouquet from mypeonika.com doesn’t have to end in a garbage bag. With a little planning, the same blooms that sat on your dining table can feed your roses next spring, scent your linen closet, or even dye a silk scarf.
This guide walks you through the full end-of-life process for a cut bouquet — from timing your decision to composting the last stem. Every step is practical, every tip is tested, and the regional differences that actually matter are called out clearly.
Before You Start: Preparation
The moment your bouquet starts showing clear signs of decline — limp stems, browning petals, heavy petal drop — is the right time to act. Waiting until flowers are completely rotten makes composting slower and repurposing impossible. Aim to catch them at the 75-percent-faded mark: color is still present, but the blooms are definitely past their prime.
Gather these supplies before you begin:
- Scissors or pruning shears (clean and sharp)
- A tray or sheet of newspaper to work on
- Rubber gloves if any stems are thorny
- A compost bin, bucket, or designated compost pile
- Optional: silica gel packets, a microwave, or a flower press for preservation projects
Sort your bouquet into three categories as you disassemble it: flowers worth preserving (still holding color and shape), stems and foliage (the bulk of compostable material), and packaging and filler (ribbon, plastic wrap, floral foam — none of which goes in compost).
Remove all non-organic materials first. Floral foam, in particular, is a polyphenol plastic that never breaks down and should go straight in the trash. Wire, rubber bands, and cellophane wrappers belong in recycling or trash depending on your local program. What remains — organic stems, petals, leaves, and seed heads — is either compostable or repurposable.
Step 1: Decide What’s Worth Saving
Not everything in a faded bouquet deserves equal treatment. Do a fast triage before committing every stem to the compost pile.
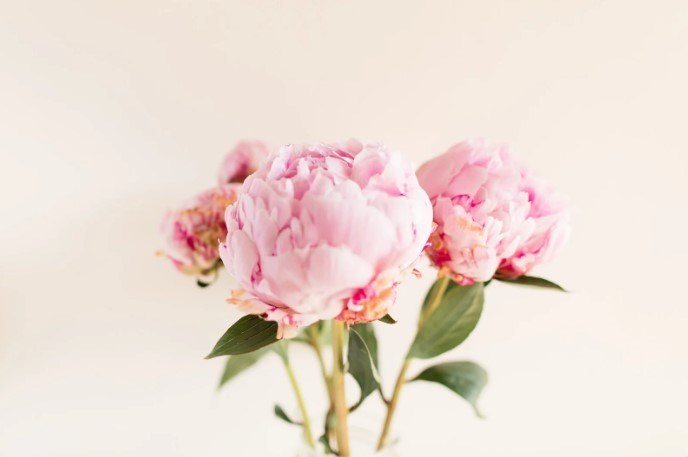
Preserve: Roses, peonies, and lavender hold color well when dried. Flowers with sturdy petals — dahlias, statice, billy balls, strawflowers — are natural candidates for air-drying or pressing. Herbs like eucalyptus, rosemary, and mint retain fragrance even when fully dry.
Compost immediately: Tulips, ranunculus, and most lilies deteriorate quickly and don’t dry attractively. Their petals go translucent and shriveled. Skip the preservation attempt and send them straight to the pile.
Use for crafts: Large petals from roses or peonies can be scattered fresh for potpourri, used as natural confetti at a backyard event, or laid flat and pressed for card-making. Even if the bloom is spent, individual petals often have another day or two of use in them.
Step 2: Dry the Flowers You Want to Keep
There are three reliable methods for drying cut flowers at home. Each produces a different result, and your choice depends on how you plan to use the dried blooms.
Air-Drying
The most hands-off method. Strip the lower leaves, group stems into small bundles of five to eight, and hang them upside down in a warm, dark, dry space with good airflow. A closet with the door cracked, a garage, or a covered porch all work. Full drying takes 10 to 21 days depending on humidity and stem thickness. Roses and lavender air-dry beautifully. Peonies are trickier — catch them before full bloom for the best results.
Silica Gel Drying
Faster and better at preserving color and shape. Bury blooms face-up in a container of silica gel crystals, seal the lid, and leave them for 48 to 96 hours. The crystals pull moisture out at a controlled rate, resulting in flowers that look nearly fresh. This method is ideal for a single statement rose or a special bloom you want to frame. Silica gel is reusable — dry it in the oven at 250°F for an hour after use.
Microwave with Silica Gel
When you’re in a hurry. Bury the bloom in silica gel, microwave on low power in 30-second intervals (typically 2 to 3 minutes total), then let it rest sealed for 24 hours. Results vary by flower type but work well for thicker blooms like garden roses. Check out the full garden rose selection at https://mypeonika.com/collections/garden-roses — those varieties dry particularly well.
Step 3: Repurpose Petals Before They’re Gone
Fresh-faded petals still hold fragrance and color. Use them in the window between “clearly past peak” and “actually rotten.”
Homemade Potpourri
Spread petals on a baking sheet and dry them in an oven set to the lowest possible temperature (usually 170°F) for two to three hours, checking every 30 minutes. Once dry, mix with dried citrus peel, whole cloves, cinnamon sticks, and a few drops of essential oil. Store in a glass bowl or linen sachet. This takes under an hour of active work and costs nothing beyond what you already have.
Petal-Infused Oil
Fill a clean glass jar with rose or lavender petals (make sure they’re fully dry to prevent mold), cover with a carrier oil such as jojoba or sweet almond, seal, and leave on a sunny windowsill for two to four weeks. Strain and use as a skin oil or add to homemade candles. This is a slow project but requires no equipment.
Natural Fabric Dye
Marigold, dahlia, and certain rose varieties yield strong pigment. Simmer petals in water for an hour, strain, and use the liquid to dye pre-mordanted fabric (cotton or silk treated with alum solution). Results are soft and earthy — think muted gold, rose-beige, and pale green. This is a weekend project, not a 20-minute task, but completely doable for anyone who enjoys hands-on crafts.
Step 4: Compost the Remaining Organic Material
Once you’ve extracted what you want to preserve or repurpose, the rest goes to compost. Cut flowers are green material in compost terms — high in nitrogen — and they break down quickly when managed correctly.
Basic Steps for Composting Flowers
- Remove all non-organic material. Twist ties, floral picks, water tubes, plastic mesh — pull them all out before anything goes in the pile.
- Chop stems into 2–4 inch pieces. Smaller pieces decompose faster. Woody stems from chrysanthemums or roses can be slow to break down if left whole.
- Balance with brown material. For every bucket of flower material (green), add roughly two buckets of dry leaves, cardboard torn into small pieces, or straw. This keeps the carbon-to-nitrogen ratio in range and prevents a slimy, smelly pile.
- Bury diseased material. If any flowers showed signs of fungal disease — powdery mildew, black spot, botrytis — bury those stems in the center of the pile where heat is highest, or skip compost entirely and trash them. A hot pile (above 130°F) kills most pathogens; a cold pile does not.
- Water if dry. The pile should feel like a wrung-out sponge. If it’s dusty, add water. If it smells like ammonia, it’s too wet — add more brown material.
How Long Does It Take?
Flower petals and soft stems break down in as little as two to four weeks in an active hot pile. Woody stems take six to eight weeks. Full maturity — the point where compost is dark, crumbly, and smells like forest floor — typically takes three to six months depending on management, materials, and weather.
Step 5: Apply or Store Your Finished Compost
Finished flower compost is nutrient-rich, moisture-retentive, and an excellent soil amendment for garden beds, potted plants, and lawn patches. Work it into the top 2–3 inches of garden soil, use it as a top-dressing around shrubs, or mix it into potting mix at a ratio of roughly one part compost to three parts existing mix.
If your pile finishes before planting season, store finished compost in a covered bin to prevent nutrients from leaching out in rain. It keeps well for six months or more in covered storage.
Regional Differences: Northeast vs. South vs. West Coast
Where you live affects both your composting timeline and the repurposing strategies that work best.
Northeast (Zone 4–6)
Cold winters mean outdoor composting slows significantly from November through March. If you’re processing a holiday or Valentine’s Day bouquet, your pile will essentially hibernate until spring. Use an insulated compost tumbler or move the bin to a sheltered spot against the house to extend the active season. For air-drying flowers, the low winter humidity in heated New England homes works in your favor — hang bundles near a heat vent and they’ll dry in 10 to 14 days rather than three weeks.
South (Zone 7–10)
Heat and humidity are your twin challenges. High summer humidity slows air-drying and encourages mold on hanging bundles — silica gel is the better choice June through September. On the compost side, the heat accelerates decomposition dramatically; a well-managed pile in Georgia or Texas can finish in six to eight weeks even in summer. Watch moisture levels closely: summer storms can saturate an open pile, turning it anaerobic and smelly. A covered bin is worth the investment.
West Coast (Zone 8–10, Pacific Northwest and California)
The Pacific Northwest’s cool, wet winters keep compost active longer than the Northeast but create mold risk for drying flowers. Use silica gel or oven-drying rather than hanging bundles outdoors. In Southern California and the Bay Area, the mild dry climate is ideal for air-drying year-round, but water is precious — a closed compost system retains moisture more efficiently than an open pile, which can dry out between waterings in a dry summer.
Seasonal Timeline: When to Do What
- January–February: Valentine’s bouquets arrive in peak winter. Focus on air-drying or silica gel indoors. Outdoor composting is slow in cold climates — add material to the pile but don’t expect fast results until April.
- March–May: Spring is prime time. Compost activates as temperatures rise, drying conditions are moderate, and finished compost can go directly into spring garden beds before planting. Mother’s Day bouquets processed now will produce finished compost by mid-summer.
- June–August: High heat speeds compost but challenges drying. Use silica gel for preservation. Turn the pile every five to seven days in summer heat — it may finish in as little as four weeks.
- September–November: Fall bouquets from weddings and harvest arrangements are rich in dried-style flowers (dahlias, marigolds, amaranth) that are naturally suited to air-drying. Get compost piles built up before the first hard freeze.
- December: Holiday arrangements with pine, eucalyptus, and holly dry well indoors. Pine and woody stems compost slowly — chip or cut small if adding to the pile.
Composting vs. Bokashi: Which Is Right for Your Situation?
Composting is often confused with bokashi, a fermentation-based system that’s increasingly popular in urban apartments. They’re not the same thing, and the distinction matters when you’re deciding what to do with spent flowers.
Traditional composting is an aerobic, microbial process that requires air, moisture, carbon, and nitrogen. It works best with volume — a pile needs to reach a minimum of 3 cubic feet to generate enough heat. It takes weeks to months and needs outdoor space or a large bin.
Bokashi is an anaerobic fermentation process using inoculated bran to “pickle” organic waste in a sealed container. It handles things traditional compost can’t — cooked food, dairy, meat — but the output is a pre-compost that must be buried in soil or added to a traditional pile to fully break down. For flowers specifically, bokashi works but is slower than traditional composting for soft organic material. It’s a good choice for apartment dwellers who have no outdoor space but want to avoid sending flowers to landfill.
If you’re deciding between them: use traditional composting if you have any outdoor space at all. Use bokashi if your only option is a countertop bin and a house plant to bury the output in.
Pro Tips
- Separate seed heads before composting. Some flowers — rudbeckia, echinacea, zinnias — produce viable seeds that survive the compost process and sprout as weeds in your garden beds. Deadhead them into the trash or save seeds in labeled paper envelopes for spring planting.
- Don’t compost invasive species. If your arrangement included any plants known to be invasive in your region (check your state’s invasive species list), trash them rather than compost. Seeds and plant fragments can survive and spread.
- Layer, don’t dump. Adding all your flower material in one thick mass creates a mat that sheds water and resists airflow. Layer an inch or two of flowers with an inch of brown material each time you add to the pile.
- Save dried petals for next year’s pressing projects. A small airtight jar of dried rose petals from a meaningful bouquet stores well for 12 to 18 months and can be used in resin art, paper-making, or wedding favor sachets long after the occasion has passed.
- Talk to your florist about sourcing. If you order regularly from a florist in Aventura or anywhere else locally, ask about seasonal and locally grown options. Flowers with shorter supply chains use fewer preservatives, which makes the whole bouquet more compost-friendly at end of life.
Frequently Asked Questions
Can I compost flowers that were treated with preservatives or flower food?
Yes. Commercial flower food contains sugar, acidifier, and a small amount of biocide — the concentrations are low enough that they don’t harm a healthy compost pile. The biocide degrades rapidly once diluted in soil. If you used a heavy dose of bleach or copper sulfate to extend vase life, let the stems drain and rinse them before adding to compost, but even then the risk to the pile is minimal.
How do I know when compost is ready to use on plants?
Finished compost is dark brown to black, crumbles easily, smells earthy (like forest floor or fresh soil), and shows no recognizable plant material. If you can still see stems, petals, or leaves, it needs more time. A rough squeeze test: grab a handful and squeeze — it should hold its shape when you open your hand but break apart easily when you poke it. If it’s slimy, it’s too wet. If it’s powdery and pale, it may be over-dried or not quite finished.
Can I compost flowers that had disease or pests?
It depends on the problem. A hot compost pile (sustained at 130–160°F for several days) kills most fungal spores, bacteria, and insect eggs. If you can confirm your pile is genuinely hot — use a compost thermometer — diseased material can go in the center. A cold pile, a tumbler that never heats up, or a bokashi system won’t reliably kill pathogens. When in doubt, trash diseased material. The risk of spreading disease to your garden outweighs the organic matter benefit.
Are all flowers safe to compost?
Nearly all cut flowers are safe. A few caveats: oleander is highly toxic and its compounds can persist — skip composting it. Lilies of the valley and foxglove contain cardiac glycosides that degrade in a hot pile but are worth being cautious about in a cold system. For the vast majority of bouquet flowers — roses, peonies, tulips, sunflowers, dahlias, ranunculus — there are no concerns. If you’re unsure about a specific variety, a quick search with the plant name plus “toxicity” will clarify quickly.
What should I do with the vase water?
Dilute flower vase water can go down the drain without concern in most municipal systems. If you want to use it in the garden, dilute it further with clean water at roughly a 1:4 ratio and apply to non-edible plants — the bacterial load from a week-old bouquet isn’t ideal for food crops. Don’t pour vase water directly into a compost pile; it’s mostly water with a small amount of organic matter and won’t meaningfully contribute to the pile’s nutrition.
What Happens When You Close the Loop

The gap between buying a bouquet and throwing it away is usually two weeks and zero thought. The gap between buying a bouquet and returning it to soil takes maybe an hour of total active work spread over a few months — and what you get back is a tangible ingredient for the next season of growing. Dried flowers from a February arrangement frame beautifully by March. Finished compost from a May bouquet goes into the garden in August. The material doesn’t disappear; it just changes form, and with minimal effort, it changes form in a way you can actually use.
That’s not a philosophical point — it’s a practical one. Less trash, better soil, and a handful of pressed petals in a frame on the wall. Start with the next bouquet that starts to fade, work through these steps in order, and within one season the process will be automatic.